
|

|
|
Learning Arduino
Inquiry-based Resources and Activities
(Gordon Payne)
"The machine is done and I want some more worlds to conquer. Life will be most flat, stale and unprofitable without something to Invent."
C. Latham Sholes, inventor of the modern typewriter, 1869.
C. Latham Sholes, inventor of the modern typewriter, 1869.
Gord's Pandemic Ventilator Project in the National Media!
Arduino Projects
(micro:Bits and Processing too)
Projects 21
Happy Heart MP3 Player, VoytiBoyd Helicopter
Projects 20
RC Aircraft Battery Timer, Cascading Casino Clock, Glove Controller using LDR
Projects 19
Halloween Fun!, Retirement Countdown Clock, 2D Plotter
Projects 18
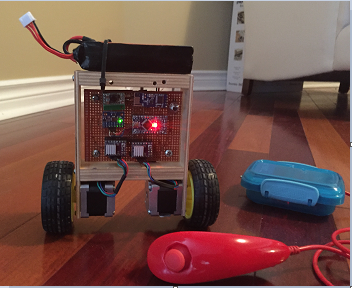
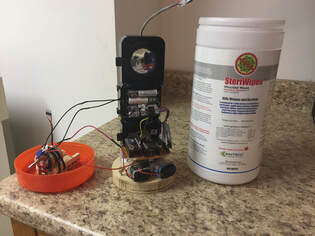
Steri - Personal Pandemic Assistant, Shakespearean Insult Generator, CLUE Self-balancing Table
Projects 17
Internet of Things Air Conditioner, PONG Game, microBit Room Occupant Counter
Projects 16
The VillageVent - Emergency Ventilator Project
Projects 15
PacMan Ghost Costume, Two-way Morse Code Transmitter/Receiver, WiFi Camera Robot
Projects 14
bluBerriSIX - Arduino TFT Screen apps
Projects 12
micro:Bit School Bus, Ping Pong Ball Cannon (autofeed too!), Meatball Shooting Gallery Game
Projects 11
Joke-o-Lantern - Hallowe'en Fun!, Arduino talks with Java Application, micro:Bit Data Logging
Projects 10
cardBot - Cardboard battle bot, the Raspberry Cobbler (Raspberry Pi Laptop),
micro:Bit wind speed Meter
Projects 9
Arduino Mini Video Arcade, Connecting an Arduino to a BBC micro:Bit, Beginner Robot
Projects 8
Processing-to-Android app game, iPhone App Controls Arduino!!!,
Wireless Track and Field timer!
Projects 7
Rock/Paper/Scissors Game, 'Plastic Ant' Battle Bot, micro:Bit TurtleBot
Projects 6
Wi-Fi enabled Pulse Monitor, Birthday Candles, HC-12 Wireless Texting
Projects 5
Self-balancing Robot, Gumball Machine, Web Server with Attached Humidity/Temperature sensors
Projects 4
"Repeat After Me!" Game, Magic 8 Ball, LasIR Tag game
Projects 3
The 'Considerate Convenience', Google Bike, SpinDuino - fidget spinner...spinner?
Projects 2
Radio Control Car, Arduino Joystick, TurtleBot with Android control
Projects 1
Slot Car Control, Soda Pop Dispenser, Self-driving Car
Arduino Learning Activities
Introduction to Arduino Programming - Course
This course includes:
1 - Building the basic circuit for the activities
2 - Operating LEDs
3 - Working with Buttons
4 - Communicating with the Serial Monitor
5 - Using a Light Dependent Resistor (LDR)
6 - Communicating between Arduino and a Processing App
Additional Arduino Circuit Activities
1. Controlling Voltage with a MOSFET
Explore - use the MOSFET circuit to turn a motor or relay off/on based on the value entered in the Serial Monitor.
- hook up 2 MOSFETs to control 2 relays or motors(one direction only!) based on the value entered in the Serial Monitor.
Why you need a diode across a relay to prevent reverse voltage on de-energizing the relay.
2. Control a Servo
Sample Code is HERE
Red wire of servo to +5V, black wire to GND, Yellow (white) wire goes to pin 9 as specified in the demo sketch.
Explore - Write a sketch that takes a number or character from the Serial Monitor and based on the value, rotates the servo a specific number degrees
clockwise or counterclockwise.
- Create an Arduino Back-scratcher! (DON'T PUT WEIGHT/LOAD ON THE SERVO - IT WILL BREAK)
3. BUILD A GOOGLE BIKE! - Emulating a USB keyboard/mouse - with Ardunio LEONARDO
Explore - hook up a button to an Arduino as an Activator. When the button is pressed, have the Arduino enter a
text phrase in a word processing document or text-editor (ex. "Admiral Grace Hopper was the Queen of Code!")
4a. Drive an LCD Display Panel - I2C Module only (2 wires)
NOTE: If address 0x27 does not work, try 0x3F. If still not working, get an I2C scanner sketch off the internet and run it. It will tell you the
address of the i2C display adapter connected to your Arduino.
Here's a link to an I2C Scanner sketch page.
Explore - Create a Marquis-style message board. Enter the message in the Serial Monitor and then have the Arduino play the message in different kinds
of scroll directions (example. "Eat At Joe's!!" will display 'Eat At Joe's" in a horizontal LEFT scroll direction in a repeat sequence.
Explore - Want BIGGER FONTS in your I2C display? Ralph Bacon shows you how to do it! It's cool!
4b. Drive an LCD Display Panel - direct connection to Arduino board (6 wires)
Explore - Create a Marquis-style message board. Enter the message in the Serial Monitor and then have the Arduino play the message in different kinds
of scroll directions (example. "Eat At Joe's!!" will display 'Eat At Joe's" in a horizontal LEFT scroll direction in a repeat sequence.
27. TFT Display Screen SPI Interface 128x160
How to use a small colour display screen for your projects. SPI interface requires 5 wires plus 3.3V, 5V and GND.
Here's the demo sketch link.
28. OLED Display Screen I2C Interface 128x64
How to use a small black and white display screen for your projects. I2C interface requires 2 wires plus 5V and GND.
Here's the demo sketch link.
You need the u8glib library for this display. To install it, click on Sketch Menu/Include library...
When the screen finishes loading, type 'u8glib'. Scroll down until you see the u8glib item. Click on it and 'Install'
5 Communicate with Arduino via Bluetooth
You can use your iPhone/iPad/Android device to talk to an Arduino by using a Bluetooth transceiver.
iOS and newer Android -> BT-05 - BLE (Bluetooth Low Energy)
Older Android device -> HC-05
You may borrow a Bluetooth module for your device from your teacher.
Load the following SKETCH into an Arduino. The pin wiring is detailed in the comments at the top of the sketch.
NOTE: Make sure your mySerial.begin(9600) line is set to the baud rate of your Bluetooth transceiver.
From the factory, they are usually 38400 baud. The example is set to 9600 baud.
Then download an Android or iOS App to your device.
Recommended Apps: iOS -> BLE Joystick, Serial
Android -> AndroidRC
Pair your device to the Android module and then send 'A', 'B' or 'C' to the Arduino and see the onboard LED turn on/off/pulse.
22. Wireless Communications with HC-12 transceivers.
These transceivers can cover distances up to 1.8 kilometres line of sight.
This excellent link has fantastic introductory lessons and sketches.
6. Distance / Motion Detection with SR-04 Module
Explore - Hook up a piezo buzzer (see activity 15 below) to the Arduino and have it play an alarm sound once the detector goes off.
Have the sketch play a higher tone the closer you get to the detector.
- Make a 'Beat the Sensor' Game. Have the sensor aimed toward a wall and then try to walk through the sensor's field of view without having the
Arduino detect that you are there.
- Write a program that makes the LCD display indicate, "INTRUDER ALERT!" when the sensor is activated at a certain minimum distance
7a. Play a Melody through a Piezo speaker
LEAVE THE RESISTOR OUT OF THE CIRCUIT! Just connect the buzzers RED wire to Arduino Pin 9 and the BLACK wire to Arduino GND
Once it's working, try to get the Arduino to play a scale or series of notes based on the frequency table link below.
Use your 4 buttons on your breadboard as different note buttons and play a different note for each button.
This demo generates tones by FREQUENCY in Hz.
A table of notes with associated frequencies is here
Alternative tone library that does not depend on timer/interrupts.
7b. Use a PASSIVE Buzzer
Different than an ACTIVE Piezo Buzzer.
7c. An Arduino PIANO
11. Reading an Infrared Remote Control
How to use a simple TV remote to control your Arduino projects.
If you're doing a project with a lot of buttons, an infrared remote may be a good option because it only requires ONE PIN on the Arduino, while giving you possibly DOZENS of buttons on the remote that you can use for your project.
This demo is based on the VS1838 Infrared Receiver Module and the 'Car mp3' remote control'. Other devices will work just as well.
MAKE A LASER TAG GAME! Two Arduinos, two IR detectors, 2 LEDs and/or buzzers, 2 IR Remotes. Each player has a "Chest pack" that contains the receiver and the Arduino. We have 9V power clips that can power your chest packs. Aim at each other with the remote and try to 'hit' the other player!
Now that's A GREAT idea if I do say! :-)
7c. Playing sounds through an 8 Ohm speaker using the pitches.h library and the tone()/noTone() commands.
This demonstration uses the pitches.h file that has notes labels associated with frequencies. It's fairly intuitive to picking specific notes to play a tune.
Look at this ToneMelody demo on the www.arduino.cc site.
NOTE: If you are using the tone()/noTone() commands and also using the IRremote library, you may find a conflict when trying to compile your sketch.
For a solution, look at the notes in item 18, "LasIR Tag" below.
8. Control Motors with an H-Bridge
Excellent article on how to use the L293D Quad-channel H-bridge to control 2 dc motors with an Arduino
Note: On the Circuit Diagram, the 'dimple' on the L293D is on the LEFT. There may be a couple of wire errors on the diagram
THE WRITTEN PIN-mappings on Page 3 ARE CORRECT!
VIDEO - How NOT to design an H-Bridge!
9. Controlling Servos with a Joystick - VERY COOL!
10. The "Considerate" Convenience
It's 3am. You GOTTA GO! Here's a solution.
Here's the Video!
Circuit Diagram
Lesson on Common Anode 3-colour LED
See activity 12 above (SR-04) and code for detecting Button Presses for hints on how to get the motion detection and colour adjus. tment to work.
12. Stepper Motor Basics and activities
Resources on how stepper motors work.
Lesson - Using a Stepper Motor Like a Servo Controlled by a Potentiometer
Lesson - Running a Stepper Motor at different speeds using the Serial Monitor
Download the AccelStepper library here
Stepper motor discussion on main Arduino forums
Very good overview of different types of motors for different applications
Excellent introductory video by Bret Statem of The Maker Show
Video demo from Bret Statem of Arduino control of stepper motor with the AccelStepper library.
Very good introductory demos by Brian Schmalz. Uses the EasyDriver module but also works with A4988 and DRV8825 modules.
13 . Read an RFID Card/Fob
Use MFRC522 Card/fob reader to build a security access application.
THIS IS A 3.3VOLT DEVICE!!! DO NOT CONNECT TO THE +5V ON THE ARDUINO! YOU'LL DAMAGE IT!
At NHS, the library for this module is in the X:/Computer Science/Arduino folder.
For the purpose of this tutorial, don't worry about using the LCD Display. Just send your output to the Serial Monitor.
14. Make an LED Tiara for PROM!!!
15. Programming an Arduino Pro / Pro Mini
You cannot connect an Arduino Pro directly to a USB port. You could use an FTDI adapter.
Or you can use an Arduino UNO to program the Mini by connecting the two together using some wires.
Here is how to program an Arduino Pro Mini with an Arduino Uno
Here is a PICTURE of the Arduino Pro Mini without headers attached. The Programming Jumper hookups are included.
Here's a PICTURE of a custom connector you can make yourself.
You need:
- 5 lengths of wire - whatever length is convenient for your purposes. Recommend not going over 30cm.
- Some Male and Female terminal strip stock.
- Soldering iron, solder and a STEADY HAND
- Some 5 minute epoxy or other glue to make sure the wires don't break off the solder joints (optional)
16. Programming an Arduino Micro Pro
Select board, 'Arduino Leonardo'. (SDA is D2, SCL is D3)
Programming Arduino with FTDI Programmer
See this attached image. Just wire up the FTDI programmer to the Arduino. You need a 1 uF Electrolytic capacitor.
Works great if you've broken the USB connector on your board!
17. Programming an ESP8266 WeMos D1R1 UNO WIFI Clone (or try D1R2 - you may have to hunt for the correct board)
Launch the Arduino IDE
Open File/Preferences. In the 'Additional Boards Manager URLs' field,
paste:
http://arduino.esp8266.com/stable/package_esp8266com_index.json
(you can click on the field expander to give more text area to paste the URL)
Go to Tools/Boards/Board Manager and scroll down until you see the ESP8266 boards.
Click the 'Install' button and let it install the software.
Then go to Tools/Boards and scroll way down to the ESP8266 section and select,
WeMos D1R1
Now you can upload sketches to the ESP8266.
BIG DISCOVERY! - The pins on the WeMos are NOT MAPPED the same as Arduino! . You need to #define them with a 'd' ex. #define D3
Here's a helpful cross-reference sheet for the WeMos D1 R1 and WeMos D1 R2
18. LasIR Tag! - Make a 'Laser' Tag game with an Infrared TV Remote Control
See the project in the Project 4 link at the top of this page.
This project uses the Infrared Remote and receiver (Activity 11 above), plus 2 LEDs, an I2C LCD Display (Activity 4a above) and an 8 Ohm speaker with the
' pitches.h' library. Melody demo is here.
Here's the Circuit Diagram.
NOTE: if you encounter a conflict between pitches.h and IRremote.h, it's a timer conflict issue. Do the following:
- go into IRremote library folder
- open 'boarddefs.h' file with WordPad or any text editor
- uncomment the "#define IR_USE_TIMER1 " line in the "Arduino Duemilanove, Diecimila, LilyPad, Mini, Fio, Nano, etc" section
(depending on the board you're using, you may need to try different timers/pins)
- save the file, quit Arduino IDE, reopen the sketch and try to compile.
19. Make Stronger Patch Cords and Wire End Connectors
When you solder thin wire onto terminal connectors, you can't apply too much heat to flow solder before the terminal strips start to melt. You use very little solder.
To make the connectors stronger, just use some 5 minute epoxy or HOT GLUE and some kitchen parchment paper (non-stick baking paper).
Tape your cable/connector to the parchment paper and then flow some mixed epoxy or glue over the connectors.
The epoxy/glue will cure and will not stick at all to the parchment. The connector will easily free from the paper.
You get a nice epoxy/glue-encased connector end on your cables/wires.
See picture.
20. Using a DHT22 Humidity and Temperature Sensor with a WeMos D1 R1 Wifi ESP8266 clone
This script works on an Arduino, but it is specific to a WeMos ESP8266 Wifi board. So the Pin for the sensor has a 'D' in front of its pin number in the declaration
For information on the differences between Arduino pin mapping and WeMos mapping, see item 17 above.
Thanks to 'ladyada' at diyprojects.io for the code! You need the Adafruit_Sensor library and the DHT library to use this sketch.
Here's the sketch. Paste it into a fresh sketch and compile/upload.
21. Using an ESP8266 WeMos D1 R1 as a WiFi Web Server. This is SO COOL!
The sketch is here. Just add your own network and password. It works with no other modifications.
The 'Projects 5' link has my demo including the humidity and temperature broadcasting from Activity 20 above.
23. Read A Data Stream and Store it as a STRING! - readALine() method.
When reading from the Serial Monitor or any other stream, all data comes in as characters.
Here's a way to take all the characters read from the stream and return them as a string.
The sketch is here.
24. HC-12 transceiver Range Testing Sketches
Determine the transmit/receive range of your HC-12 modules using these simple sketches.
Load each sketch on a separate Arduino/HC-12 setup. Put an LED on pin 7 of the receiving setup.
Tx broadcasts a regular 'ping' sequence. Rx listens for the 'pings' and flashes an LED off/on as long as it's receiving pings.
Start increasing the distance between the transmitter and the receiver sets.
As soon as the LED stops flashing, you've found your maximum range.
The sketches are here.
25. Real Time Data Sensor Recording using Parallax Add-in to Excel
This software is an Add-in to Microsoft Excel. You install it and then run the demo spreadsheet. It provides a dialog on the sheet where you
choose the COM port that your Arduino is on and set the baud rate. Then your Arduino sketch just send data to that COM port and it's recorded
in the spreadsheet.
Here's a great website with video demo of Parallax.
Here's a sample Arduino sketch with the column information and the println statements that send the data to the Parallax spreadsheet.
The demo was just a 10K potentiometer hooked up to analog port A0.
Here's a link to the software download on the Parallax website. File is dated 2014. No word on future releases.
Here's the link to version 2.11, a 64-bit updated version of PLX. Go to the May 7,2017 entry on the forum page and the links with user guide are at the bottom of the
entry.
26. Writing Data to an SSD memory card with an SSD shield (CATALEX MicroSSD card adapter)
Using this SSD shield, you can write data to a file in comma, tab or any type of delimeter you like. Then just put the SSD card in a computer and open the file in Excel
or whatever you like. Notice in the demo script that some additional libraries are required.
Here's the demo sketch.
27. TFT Display Screen SPI Interface 128x160
How to use a small colour display screen for your projects. SPI interface requires 5 wires plus 3.3V, 5V and GND.
Here's the demo sketch link.
28. OLED Display Screen I2C Interface 128x64
How to use a small black and white display screen for your projects. I2C interface requires 2 wires plus 5V and GND.
Here's the demo sketch link.
You need the u8glib library for this display. To install it, click on Sketch Menu/Include library...
When the screen finishes loading, type 'u8glib'. Scroll down until you see the u8glib item. Click on it and 'Install'
29.E-paper with ESP32 Development Board and ESP8266 Mini D1 (works well).
WaveShare / MH-ET 1.54" E-paper display modules with GxEPD library
2019 and later ESP32 Dev Board - See this video at 3:00 for pinouts
ESP32 display object for Black/White/Red module
GxEPD2_3C<GxEPD2_154c, GxEPD2_154c::HEIGHT> display(GxEPD2_154c(/*CS=5*/ SS, /*DC=*/ 22, /*RST=*/ 21, /*BUSY=*/ 4));//WORKS FEB 2020
If get a bunch of Compile errors, like 'multiple object definition', it's because the sample scripts include .ccp instead of .h. Replace the .cpp with .h
When uploading, may have to hold down the BOOT button which shorts IO0 to ground to put in upload mode.
Programming the BBC micro:bit with the Arduino IDE
Excellent AdaFruit tutorials on programming the BBC micro:bit with the Arduino IDE
If you find you're getting compile errors, try using a lower revision number of the Nordic Semiconductor drivers (ex. 0.3.0 or 0.5.0)
What happens when you declare a variable with #define? Well..it's NOT a variable :-)! Great explantion is here!
What's the Difference between all the Arduino Models?
And here's an explanatory video from Sparkfun too!
Comparison of different Radio Technologies - youtube
KY Sensor Demo Code and more KY Sensor Information here with sketches
Arduino Built-in Examples - from www.arduino.cc
Introduction to Electricity and Arduino - Massimo Banzi - REALLY GREAT! - 10 minute segments
DIY Hacking - Cool Arduino Projects
Introduction to Electricity - Sparkfun Youtube Series with Shawn Hymel - EXCELLENT!
Very thorough Electronics Tutorials - First language of the writer isn't English, but the explanations are very good.
Cool DigiSpark Projects (the really small Arduino based on the ATTiny85)
WHY DO WE NEED PULL-UP and PULL-DOWN Resistors? Explanatory Video
Ralph S. Bacon's FANTASTIC Arduino Youtube Channel - very thoughtful, thorough an engaging videos on various aspects of Arduino
USB Windows Drivers for the UNO Clones (CH340)
APPLE USERS! PROCEED AT YOUR OWN RISK!
Some drivers will specifically CRASH OS High Sierra. BE CAREFUL! You've been warned!
REGARDLESS OF YOUR OS VERSION, you attempt the installation at YOUR OWN RISK!
APPLE USERS! PROCEED AT YOUR OWN RISK!
Some drivers will specifically CRASH OS High Sierra. BE CAREFUL! You've been warned!
REGARDLESS OF YOUR OS VERSION, you attempt the installation at YOUR OWN RISK!
Supporting Documents for this page:
| introtoarduinocodepackmay2018.pdf |
| 5._using_the_arduino_status_monitor.pdf |
| 7. controlling_voltage_with_a_mosfet.pdf |
| 9. Emulating_a_usb_keyboard_with_arduino_leonardo.pdf |
| 12. Distance_measuring_with_sr-04.pdf |
| 18. dlrobotwithbluetoothandandroidcontrol.pdf |
| 19. the_considerate_convenience.pdf |
| servodemo.txt |
| control_stepper_motor_with_a_potentiometer.pdf |
| http://hausofpayne.weebly.com/uploads/7/3/5/8/7358171/steppermotorserialmonitordemo.txt |
| reading_an_infrared_remote_control2020.pdf |
| i2c_lcd_display.pdf |
| miniprogrammingcable.jpg |
| passive_buzzer.pdf |
| stepperpotdemo.pdf |
| patchcord.jpg |
| wemos_pins_00.pdf |
| temperaturehumiditydht22sketch.txt |
| readaline_method.txt |
| hc12ping_sketches.txt |
| parallaxdemoforarduinoexcel.txt |
| writefiletossdcarddemo.txt |
| simplebluetoothreceiver.txt |
| kysensorsketches.txt |
| oleddemosketch.txt |
| program_arduino_with_ftdi_programmer.png |
THE WORLD NEEDS INVENTORS AND INNOVATORS!
If you have an idea for a product or invention that you can use
Arduino to build, GIVE IT A SHOT!!!!
If Alexander Graham Bell hadn't 'given it a shot', we wouldn't be able to waste 8 hours a day watching Kitten Videos on our phones!!! (and what an empty life it would be!)
Your teacher can help you think of ways to combine different Arduino circuits to build different machines.
